How to Export and Import Policies in Group Policy Editor
Using the File Explorer is the easiest way
![]() 3 min. read
3 min. read
![]() Published on
Published on
Share this article

Improve this guide
Read our disclosure page to find out how can you help Windows Report sustain the editorial team Read more
If you want to apply the same Group Policy settings on multiple computers in your network, you can Export and Import them from gpedit.msc instead of setting the same policies on the system separately.
How can I export and import policies from gpedit.msc?
1. Using the File Explorer
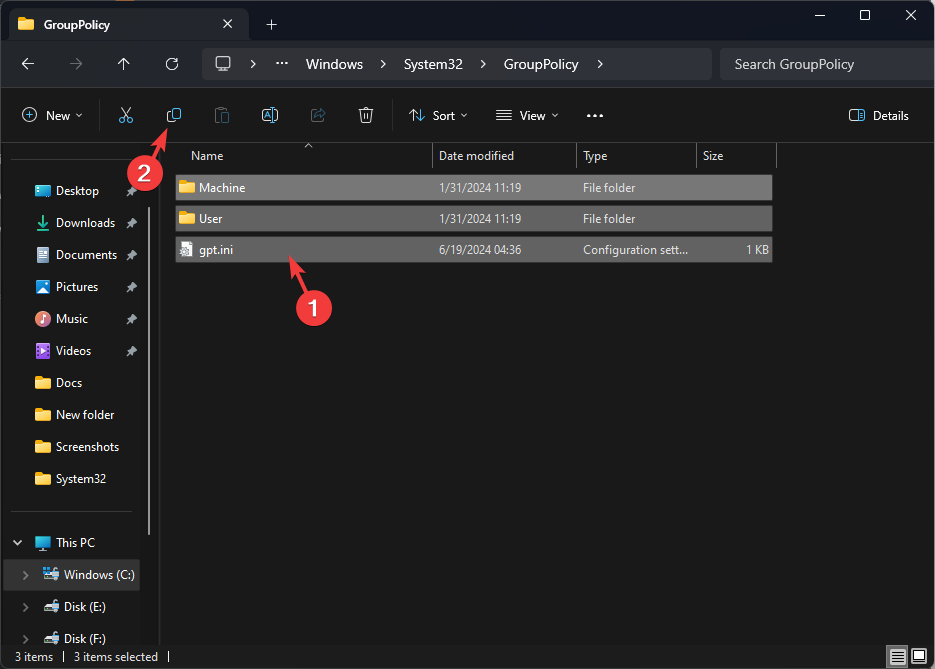
- Press Windows + E to open the File Explorer window.
- Navigate to this path:
C:\WINDOWS\System32\GroupPolicy - Copy all the files in the folder and save them in a pen drive or cloud.
- Now paste them to the folder on the destination PC. Click Yes or Continue if you get a UAC prompt.
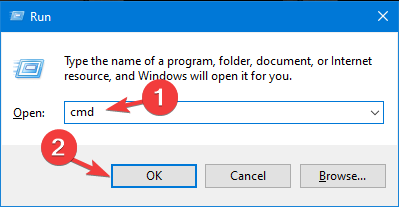
- On the destination PC, press Windows + R to open the Run dialog box.
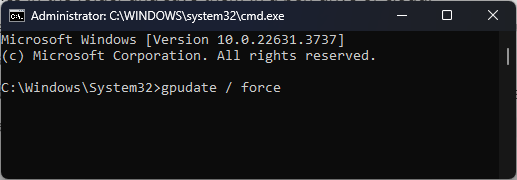
- Type cmd and press Ctrl + Shift to open the Command Prompt with administrator rights.
- In the Command Prompt window, type the following command and hit Enter:
gpudate / force

If the Group Policy is not applying your changes, you can explore our detailed guide to know how to fix the issue.
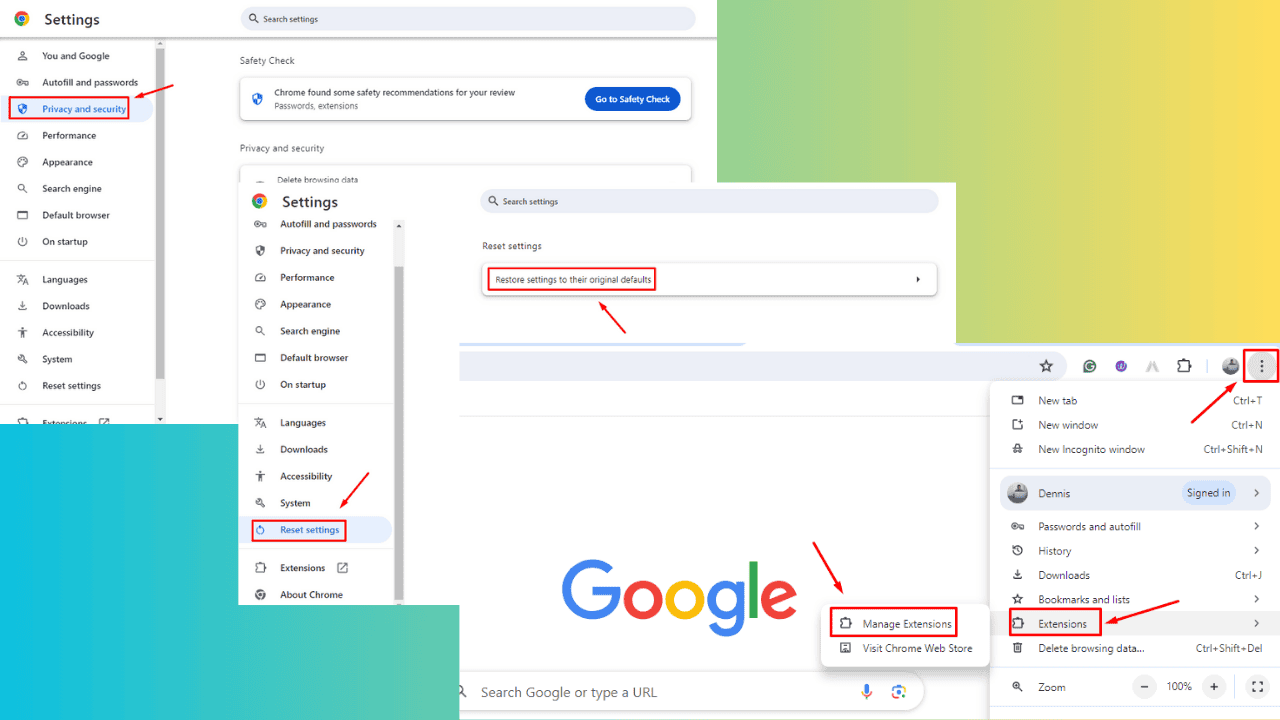
2. Using the Microsoft Management Console
1. Export the policy
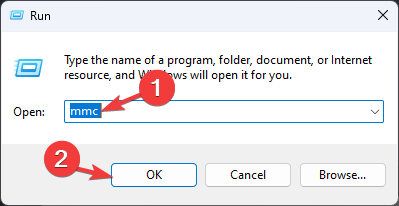
- Press Windows + R to open the Run dialog box.
- Type mmc and click OK to open the Microsoft Management Console.
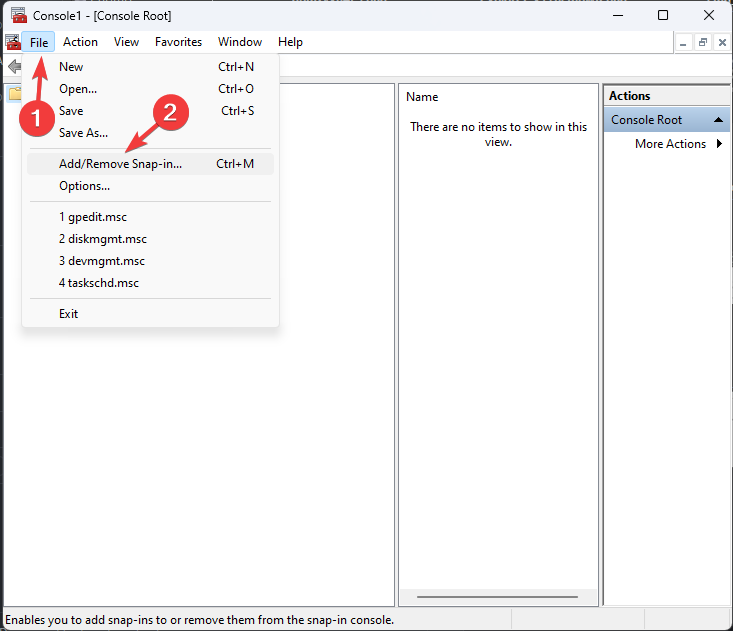
- On the console, click File from the menu at the upper left corner, then click Add/Remove snap-in.
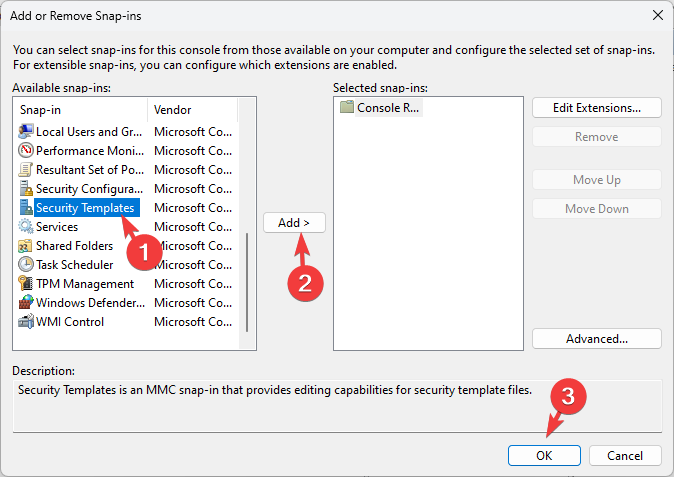
- From the Add or Remove Snap-ins window, select Security Templates, and click Add, then OK.
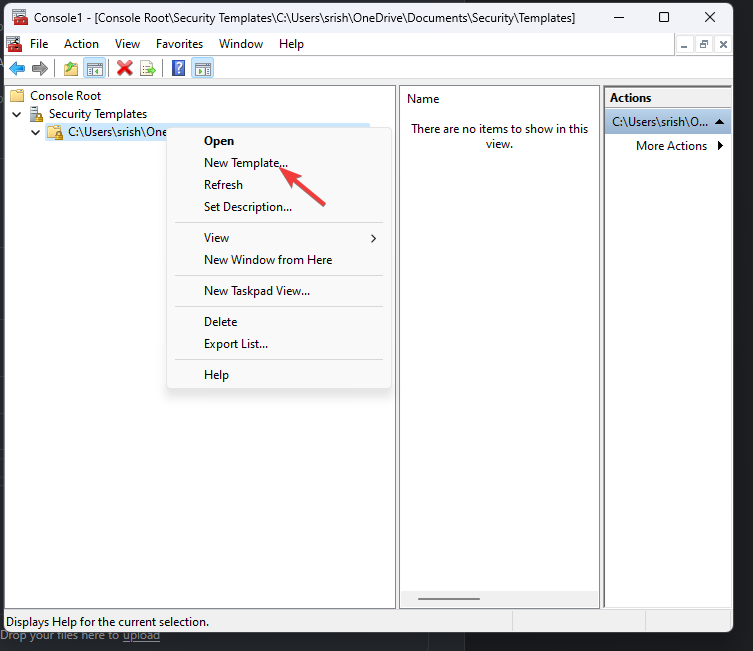
- Now, under Console Root, you will see Security Templates; click it to expand, then right-click the element and select New Template from the context menu.
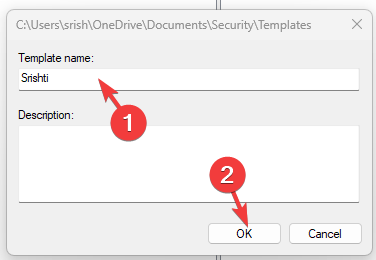
- In the following popup, enter a custom name for the template.
- Next, expand the template you created and configure all the policies how you want.
- Once done, right-click the template, then click Save as from the context menu.
- Select the location where you want to save the INF file, then click Save.
- Copy and paste this file to the destination PCs where you want to implement these policies.

If you can’t find the Management console on your computer, follow these simple steps in this guide to install it.
2. Import the policy
- On the destination PC, press Windows + R to open the Run dialog box.
- Type cmd and press Ctrl + Shift to open the Command Prompt with administrator rights.
- In the Command Prompt window, type the following command after replacing PathToINF with the path where you pasted the INF file and hit Enter:
secedit /configure /db %temp%\temp.sdb /cfg <em>PathToINF</em> - Restart your computer to save the changes.
In conclusion, using File Explorer and Management Console on Windows 11 is the easiest way to set the same group policies on different computers without physically being there.
If you want to export Group Policy settings on a Windows 7 computer, we have a separate guide for you. Did you find this guide useful? Let us know in the comment section below.